Best Plate Carrier Setup Guide: When it comes to setting up your plate carrier, there’s no one-size-fits-all approach. Whether you’re a military operator, law enforcement officer, or civilian enthusiast, your setup will depend on your mission, personal preferences, and the equipment you carry. But getting it right can mean the difference between life and death in a high-stakes situation.
That’s why in this blog post, we’ll delve into the art of plate carrier setup, covering everything from choosing the right carrier to configuring your pouches and accessories.
Related Post: Setup Guide for Special Forces Plate Carriers
Best Plate Carrier Setup | Complete Guide
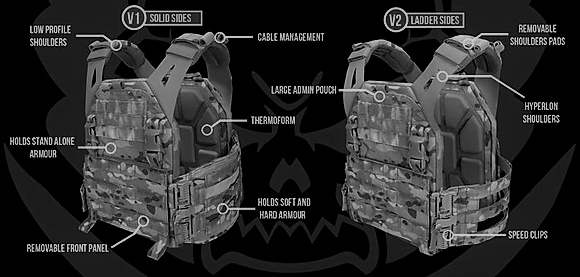
The first step in setting up your plate carrier is to choose the right carrier for your mission. There are different types of plate carriers available, each with its unique features and benefits. Some plate carriers are designed for military operations, while others are intended for law enforcement or civilian use.
When choosing a plate carrier, consider factors such as the type of operation you will be conducting, the level of ballistic protection required, and the length of time you will be wearing the carrier.
Related Post: How to Choose a plate carrier for your mission?
Load the Right Body Armor into Your Plate Carrier
After selecting the appropriate carrier, the next step is to load it with the right body armor. There are different types of body armor available, ranging from soft armor to hard plates.
Soft armor is designed to protect against handgun rounds, while hard plates protect against rifle rounds. When loading your plate carrier with body armor, make sure that the armor fits snugly and is positioned correctly to provide maximum protection.
Mission Critical Items for Your Plate Carrier Loadout
When it comes to your carrier setup, you need to ensure that you have all the necessary equipment to complete your mission.
However, some items are considered mission-critical, and you should always have them on your plate carrier. These mission-critical items include:
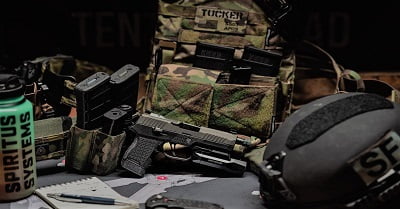
First Aid Kit (IFAK) – A first aid kit should be your top priority when putting together your plate carrier setup. Your IFAK should include essential medical items such as tourniquets, hemostatic agents, pressure dressings, chest seals, and trauma shears.
Related Post: IFAK Setup on Plate Carrier
Magazines – Magazines are essential for carrying ammunition, and you should always have enough magazines to complete your mission.
Communication Equipment – You should have a reliable radio with a comfortable headset that allows you to communicate with your team members effectively.
Pistol – A pistol is a vital secondary weapon that can be easily concealed in a holster on your plate carrier. A pistol provides you with a last line of defense and can save your life in close-quarter combat.
Pistol Setup for Your Plate Carrier
When it comes to setting up your pistol on your plate carrier, there are several things you need to consider. First, you need to choose the right holster for your pistol. The holster should be comfortable and secure and should keep your pistol in a fixed position.
Next, you need to consider the placement of your pistol on your plate carrier. The most common location for a pistol on a plate carrier is on the front of the carrier, just below the chest. This location provides quick and easy access to your pistol.
Radio Setup for Comms
Communication equipment is essential for effective communication within a team, and a reliable radio is a critical component of your plate carrier setup. When setting up your radio on your plate carrier, you need to consider the following:
Admin Pouch for Plate Carriers
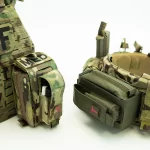
An admin pouch is a small pouch that is used to carry items that you need quick access to, such as a map, compass, or flashlight. An admin pouch can be attached to the front or sides of your plate carrier, and it should be easily accessible.
Keeping Magazines Handy with Mag Pouches
Magazine pouches are essential for carrying ammunition, and they should be easily accessible. When choosing magazine pouches, you need to consider the following:
Tactical Knife Plate Carrier Placement
A tactical knife is a valuable tool in close-quarter combat, and it should be easily accessible. When setting up your plate carrier, you need to consider the placement of your knife. The most common location for a knife on a plate carrier is on the front of the carrier, just below the chest.
Related Post: How to attach a tactical knife to a plate carrier?
How to set up a plate carrier? Steps of fitting the plate carrier
It is imperative to know the complete method of setting up your plate carrier before using it and attaching different pouches. The primary purpose of producing a plate carrier is to protect your heart and lungs. So, it is essential to make sure that you carry it properly.
These steps will help you in all carrier setups like police, USMC setup, army, condor setup, home defense, etc.
Step 1- Take off the side panels
It would be best if you took off the side panels before starting any adjustment of the plate carrier.
Step 2- Adjusting the front panel
If it is done, you should grab the front panel of the chest rig and adjust it under the collarbone around two fingers wide. It assures that a plate entirely secures your vital organs.
Step 3- Adjusting the back panel
The back panel also adjusts at the same height as the front panel. When both panels adjust correctly, then you should adjust the shoulders.
Step 4- Adjusting shoulders
Also, when you do this, please ensure that the shoulders of the plate carrier are balanced equally. Make sure that the shoulder straps are in the proper place as well. Otherwise, you will walk crooked.
Step 5- Adjusting side panels
Now put the side panels, and attach them to the front and back panels. After all these steps, you should go for a test.
Step 6- Testing your adjustment
To evaluate your adjustment, you should bend forward, backward, and sideways, push your arms up, and feel. If something is pinching, you should move your vest where you feel comfortable.
Different Plate Carrier Vest Setups Based on Your Mission Profile
Just like how different missions require different types of weapons and equipment, different missions also require different carrier setups. For example, a SWAT team may require a more heavy-duty plate carrier setup than a civilian who is just looking for home defense.
When choosing a plate carrier setup, consider your mission profile and the type of environment you will be in. Will you need to carry additional equipment or ammo? Will you be in a hot or humid climate that requires a more breathable plate carrier? Keep all these factors in mind when selecting your plate carrier.
Condor Sentry Plate Carrier Setup
The Condor Sentry is a popular plate carrier setup that is known for its affordability and durability. It’s designed to hold two 10×12-inch ballistic plates and features adjustable shoulder straps and a cummerbund for a customizable fit.
To set up your Condor Sentry, first, adjust the cummerbund to fit your waist. Then, attach your ballistic plates to the front and back plate pockets. Finally, adjust the shoulder straps to ensure a snug and comfortable fit.
Lightweight Plate Carrier Setup Guide
If you’re in a hot or humid climate, then you may want to consider a lightweight plate carrier setup that is designed to be more breathable and lightweight.
A lightweight plate carrier typically features a minimalist design, with fewer pockets and attachments than a standard plate carrier. This helps to reduce the overall weight and increase ventilation.
Ranger Plate Carrier SETUP Guide
Setting up a Ranger plate carrier requires a bit more effort than the other setups. The Ranger plate carrier is designed to hold multiple ballistic plates, so you must adjust the straps accordingly. First, loosen all the straps and lay the carrier flat on the ground. Then, place the plates in their designated pockets and secure them using Velcro straps.
Next, lift the carrier and adjust the shoulder straps. The shoulder straps should sit comfortably on your shoulders and not dig into your skin. Adjust the waist straps and ensure the carrier sits firmly on your chest. Finally, adjust the cummerbund to fit your waist snugly. The cummerbund is designed to hold additional plates or accessories, so adjust it accordingly.
Civilian Plate Carrier SETUP Guide
The civilian plate carrier setup is similar to the minimalist or slick setup but with a few additional features. The civilian plate carrier typically has more pockets and is designed to hold additional gear.
To set up a civilian plate carrier, first, lay it flat on the ground and insert the ballistic plates. Next, adjust the shoulder straps to fit your body, and then adjust the waist straps. The cummerbund on a civilian plate carrier is typically adjustable, so adjust it to fit your waist snugly.
Military Plate Carrier SETUP Guide
The military plate carriers setup is similar to the Ranger plate carriers setup. The military plate carrier is designed to hold multiple ballistic plates and is typically loaded with additional gear. To set up a military plate carrier, first, lay it flat on the ground and insert the plates.
Home Defence Plate Carrier SETUP Guide
The home defense plate carrier setup is designed for quick access to gear in case of an emergency. To set up a home defense plate carrier, first, lay it flat on the ground and insert the ballistic plates.
Then, adjust the shoulder straps and waist straps to fit your body. The cummerbund on a home defense plate carrier is adjustable. Finally, add any additional gear you may need, such as a first aid kit, flashlight, or ammunition.
LAW Enforcement Plate Carrier SETUP Guide
The law enforcement plate carrier setup is designed for police officers and other law enforcement personnel. To set up a law enforcement plate carrier, first, lay it flat on the ground and insert the ballistic plates.
Adjust the shoulder straps and waist straps. The cummerbund on a law enforcement plate carrier is typically adjustable, so adjust it to fit your waist snugly. Finally, add any additional gear you may need, such as a first aid kit, handcuffs, or radios.
SWAT Plate Carrier SETUP Guide
The SWAT plate carrier setup is similar to the law enforcement plate carriers setup but with additional gear. The SWAT plate carrier is designed to hold multiple plates and accessories, such as ammunition, medical kits, and radios.
To set up a SWAT plate carrier, lay it flat on the ground and insert the plates. Next, adjust the shoulder straps and waist straps to fit your body. The cummerbund on a SWAT plate carrier is typically adjustable.
Medic Plate Carrier SETUP Guide
A medic plate carrier setup is designed for first responders who need to carry medical supplies and equipment in the field. This setup typically includes pouches for items such as tourniquets, trauma shears, bandages, and airway management equipment. The plate carrier itself may also feature a large red cross or other identifying marker to indicate the wearer is a medic.
When setting up a medic plate carrier, it’s important to consider the specific needs of the user and the demands of their job.
For example, a medic who primarily works in urban areas may need to carry different supplies than one who works in a remote wilderness setting. The placement of the medical pouches should also be carefully considered to allow for quick and easy access to the necessary supplies.
Steps for Testing Your Plate Carrier Setup
Testing your setup is undoubtedly necessary; this test will reveal bugs that might require some improvements. This process might involve detaching or re-attaching a few things. Still, we have been trying to protect you from detaching and re-attaching as possible.
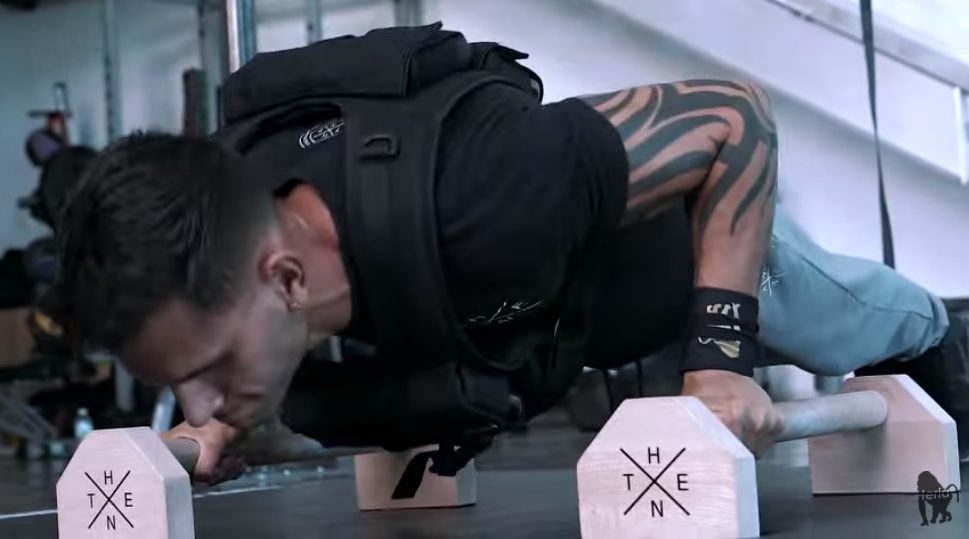
Step1- push-ups
Doing push-ups is the best way of testing your airsoft plate carrier setup. It can reveal three flaws:
- A few things might make noise while jumping.
- This up-and-down movement will test whether anything does not fit or falls off your carrier.
- It will ensure that the movements are painless or complicated.
Step2- Reloading
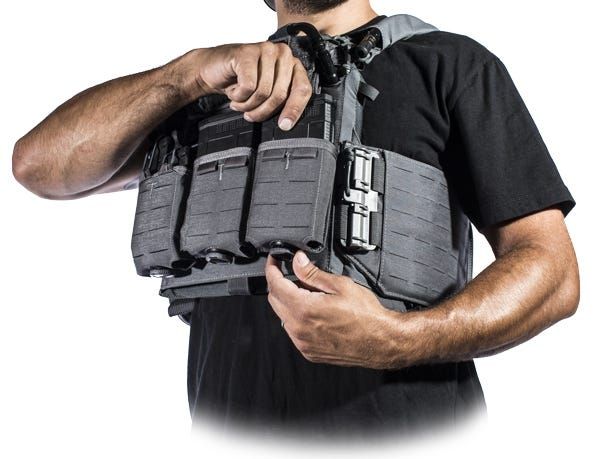
The further step for testing your setup is recommended to reload every mag pouch. It will ensure that it is the most accessible reach or adjustments needed.
Step3- Training
In the last step, you should test your plate carrier setups by dry firing. It might reveal a few other weaknesses as well.
Frequently Asked Questions
